How to Build a ESP32 Drone controlled by Web browser
Motivation
I bought a drone kit for autonomous flight experiments. A number of so-called Flight Controllers are available on the Internet. I assumed I could use somthing like BetaFlight to manage basic tasks such as position hold. Unfortunately, this is currently not possible. BetaFlight is currently able to control a throttle, let the drone fly horizontally, avoid set a greater than the preset flight angle and to veer. BetaFlight must be a propperly set of course.
The pilot is a feedback control system. There is many ways how to transfer this responsibility to a software. Because i am a web developer, it is easy for me to connect the drone to the internet and send commands to it via higher programming languages such as JavaScript. At first I planned to use an Arduino, ultrasonic and barometric sensors for altitude hold. Low level control itself should have been provided by the Arduino. All I had to do was to design the control system.
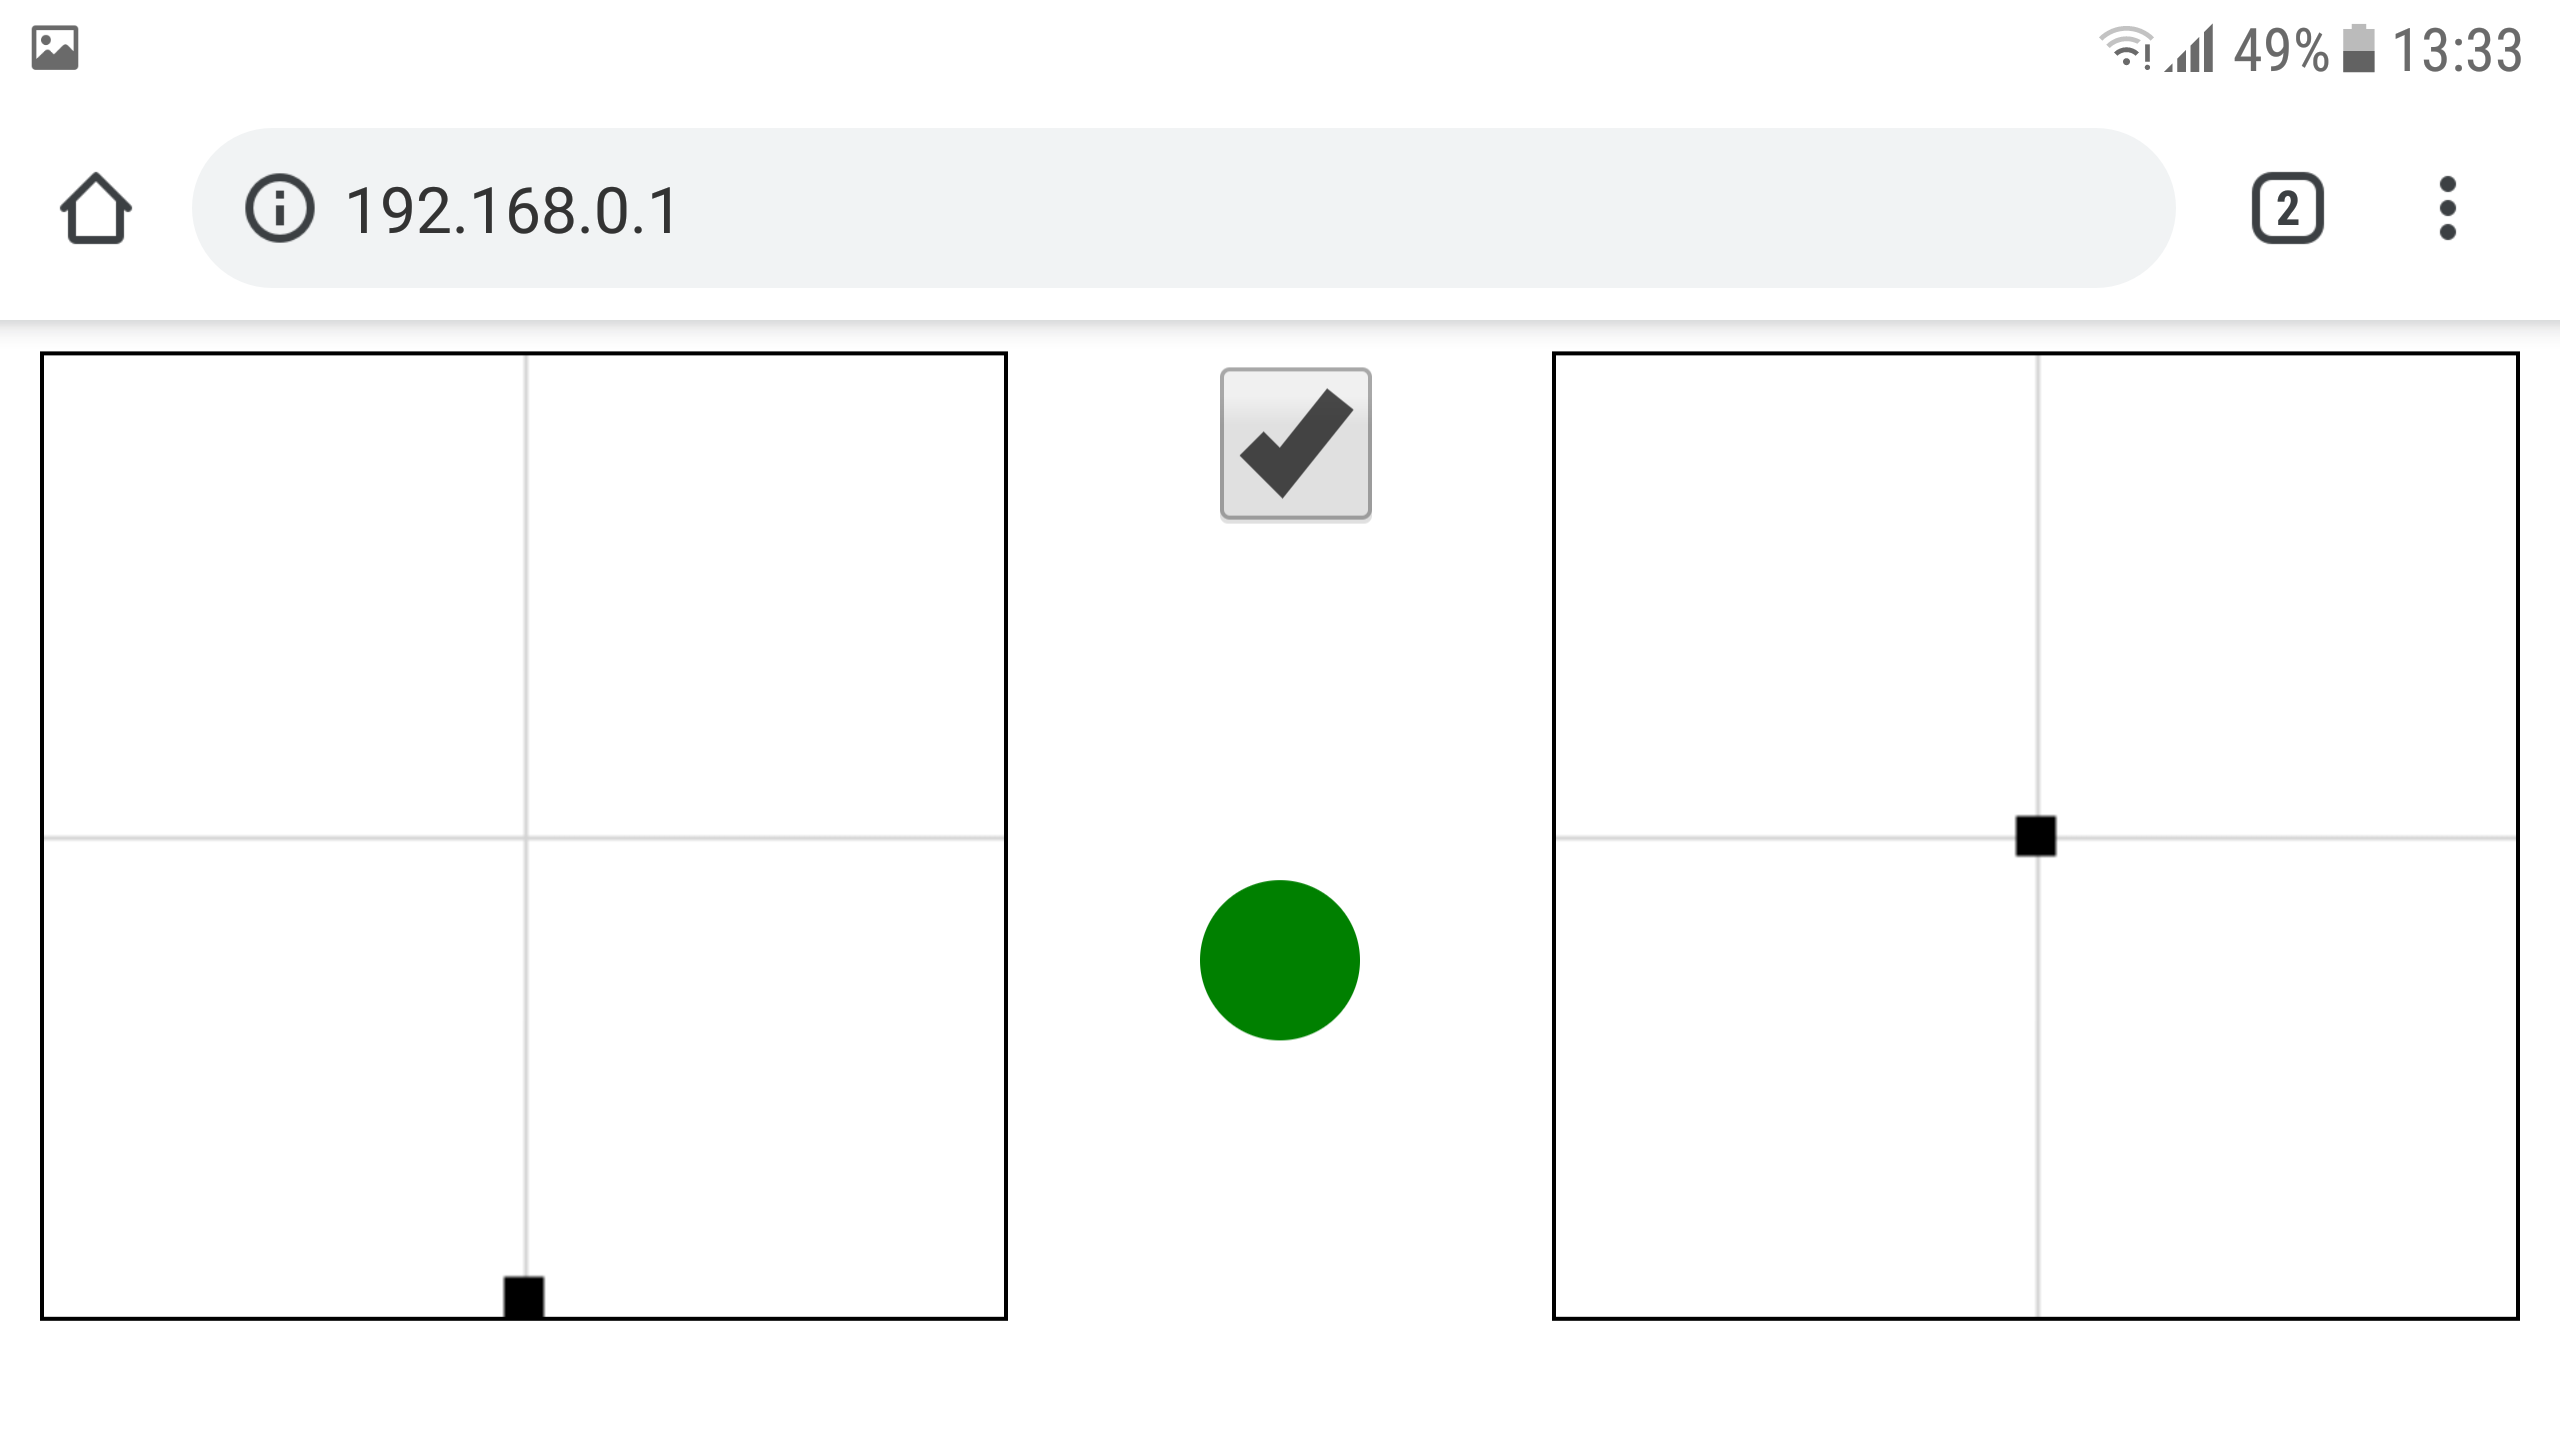
I wanted to try the drone before I started designing the autonomous control system. I had no traditional RC controller. I thought to make it myself. After the first lite version was done, i’ve published first flight video. Dozens of people contacted me asking for advice. I decided to make a really useful WiFi RC controller and write this tutorial.
Warning
Drone is a very dangerous machine that can cause great damage to property and health. You do so at your own risk and are responsible for compliance with the laws of your country’s jurisdiction.
WiFi was not designed for real time robust control applications. It is not appropriate to it. Especially when used with mobile web browser. There are many layers between user fingers and real drone behavior. My vision was to send commands to an autonomous system instead of it’s real time control.
Selection and construction of a suitable drone
It is not a goal of this tutorial to explain building of a drone itself. There is many informations about it on the Internet. Here is only few of my insights.
My first drone was QAV 250 kit. It was the cheapest frame, but it was not appropriate for my purposes. It was too fast system with insufficient carrying capacity. It was asymmetric and was not enough stable. You can see it on first flight video.
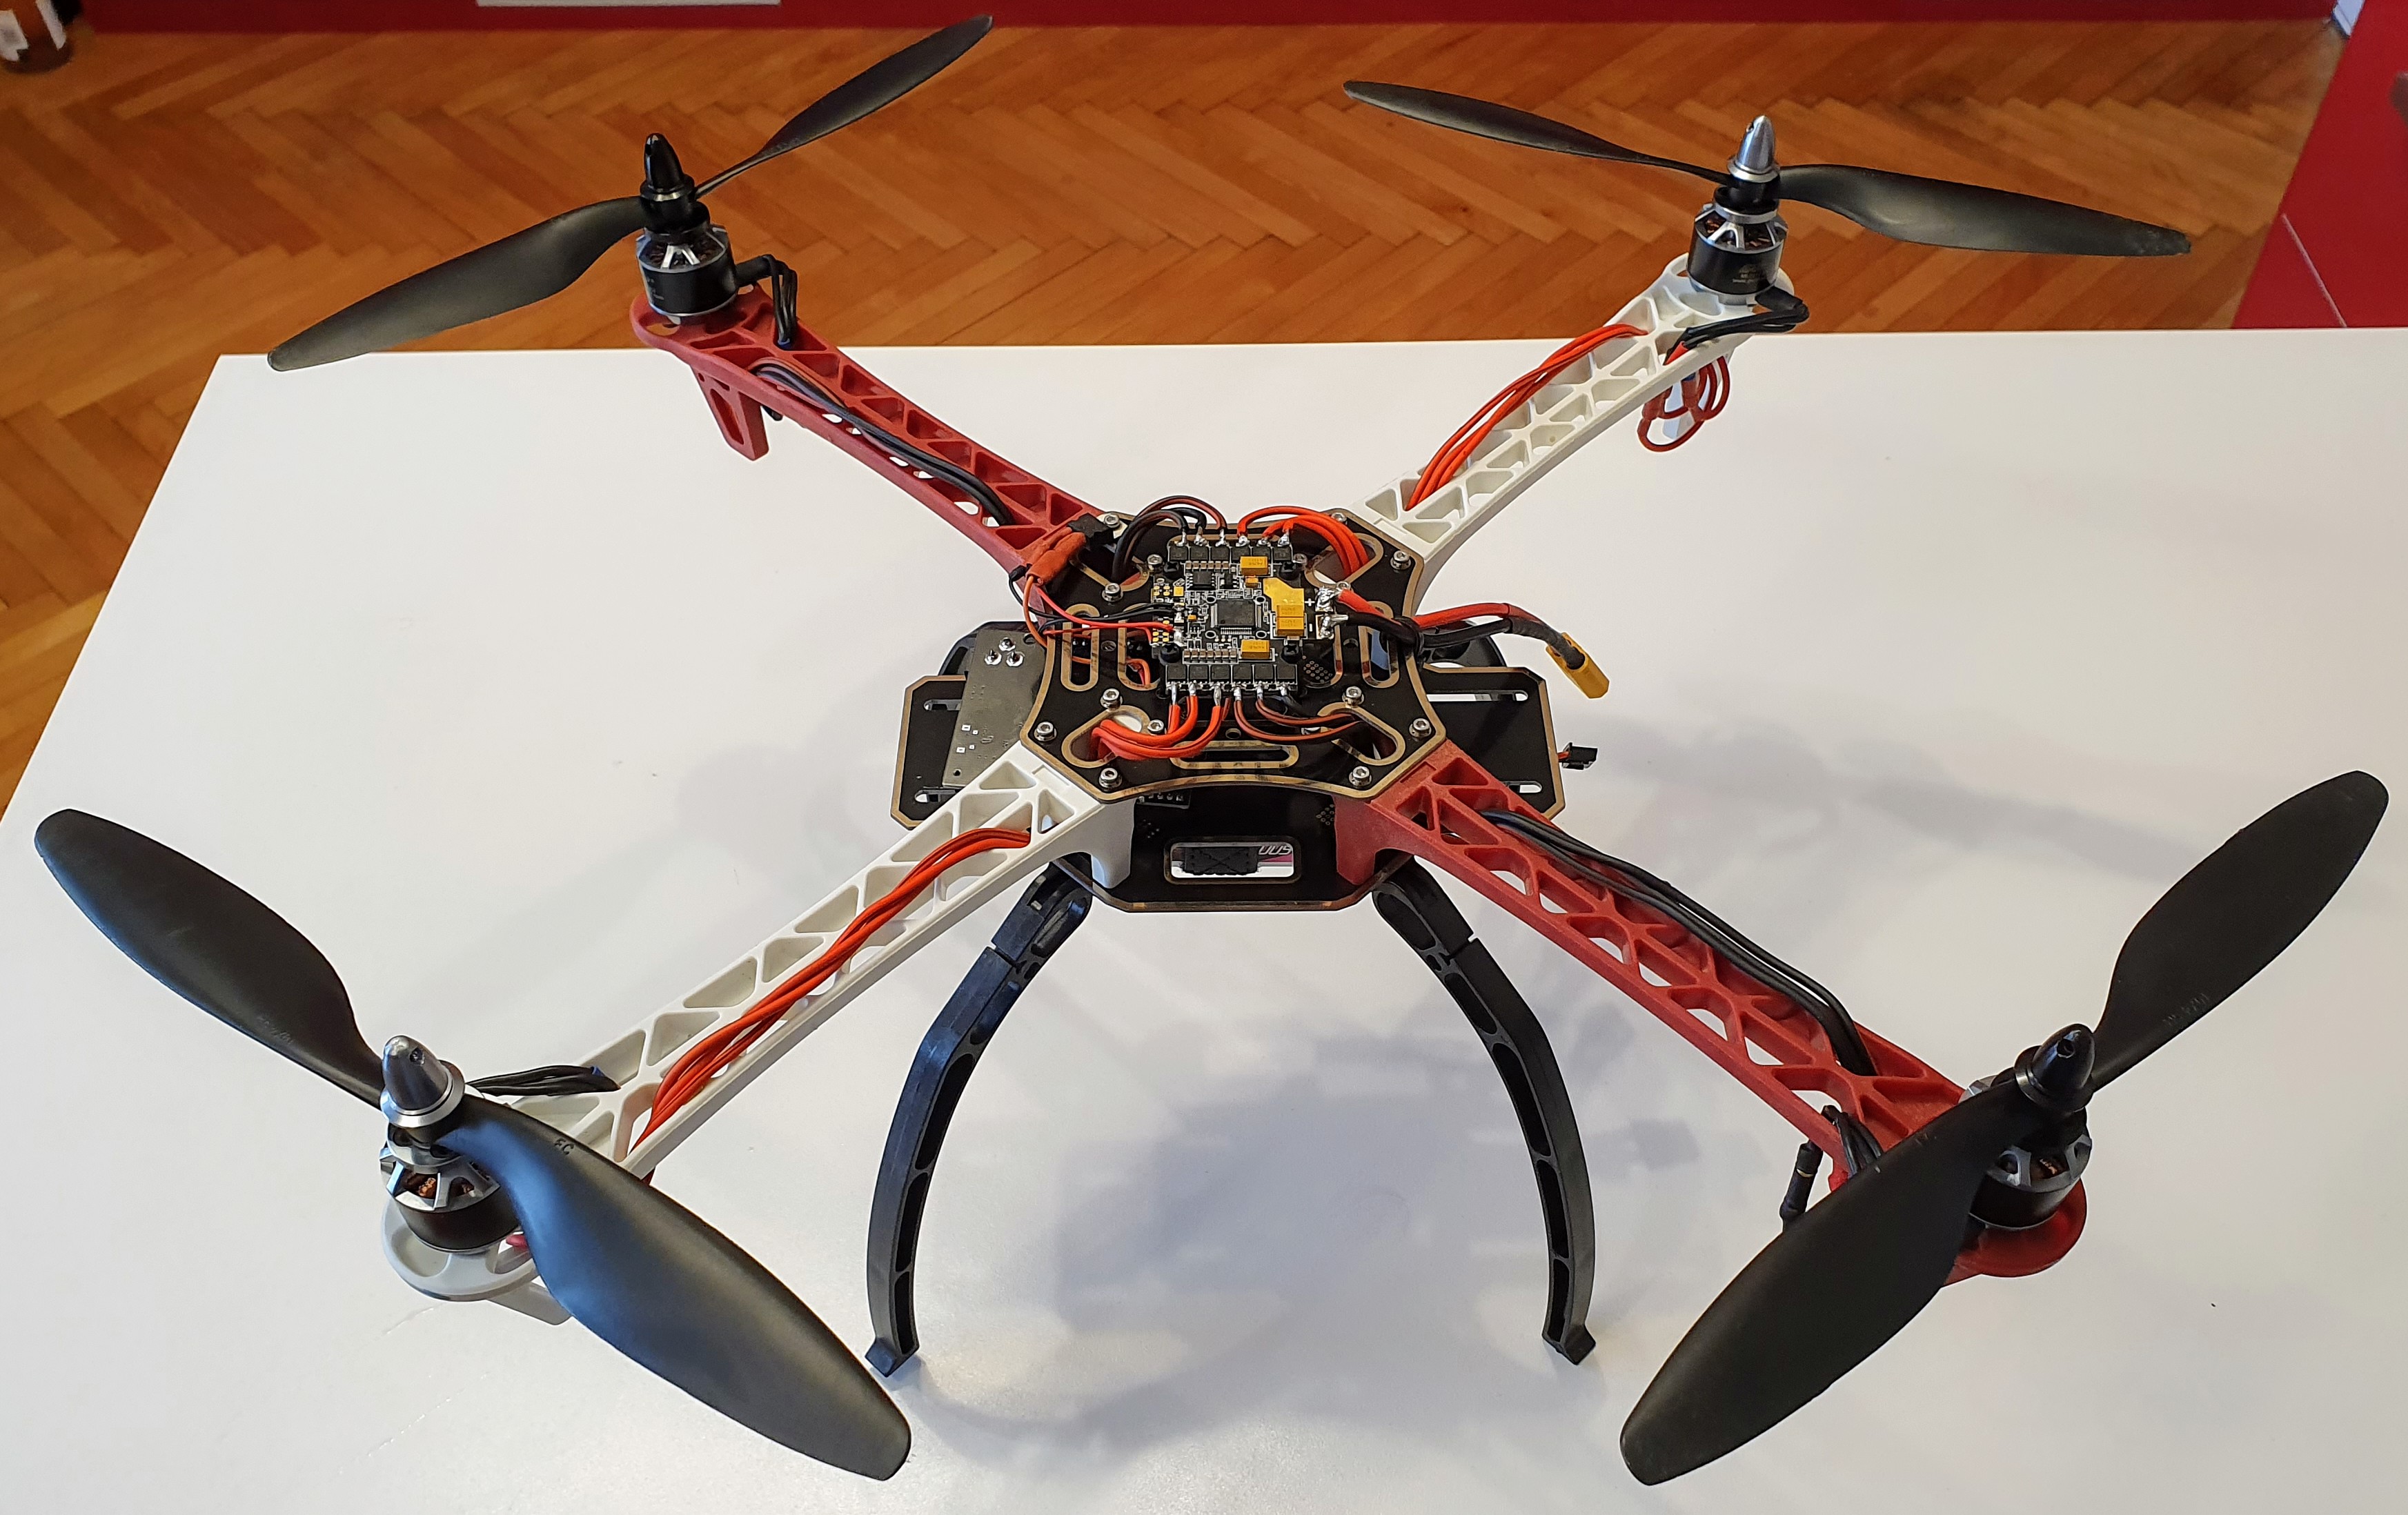
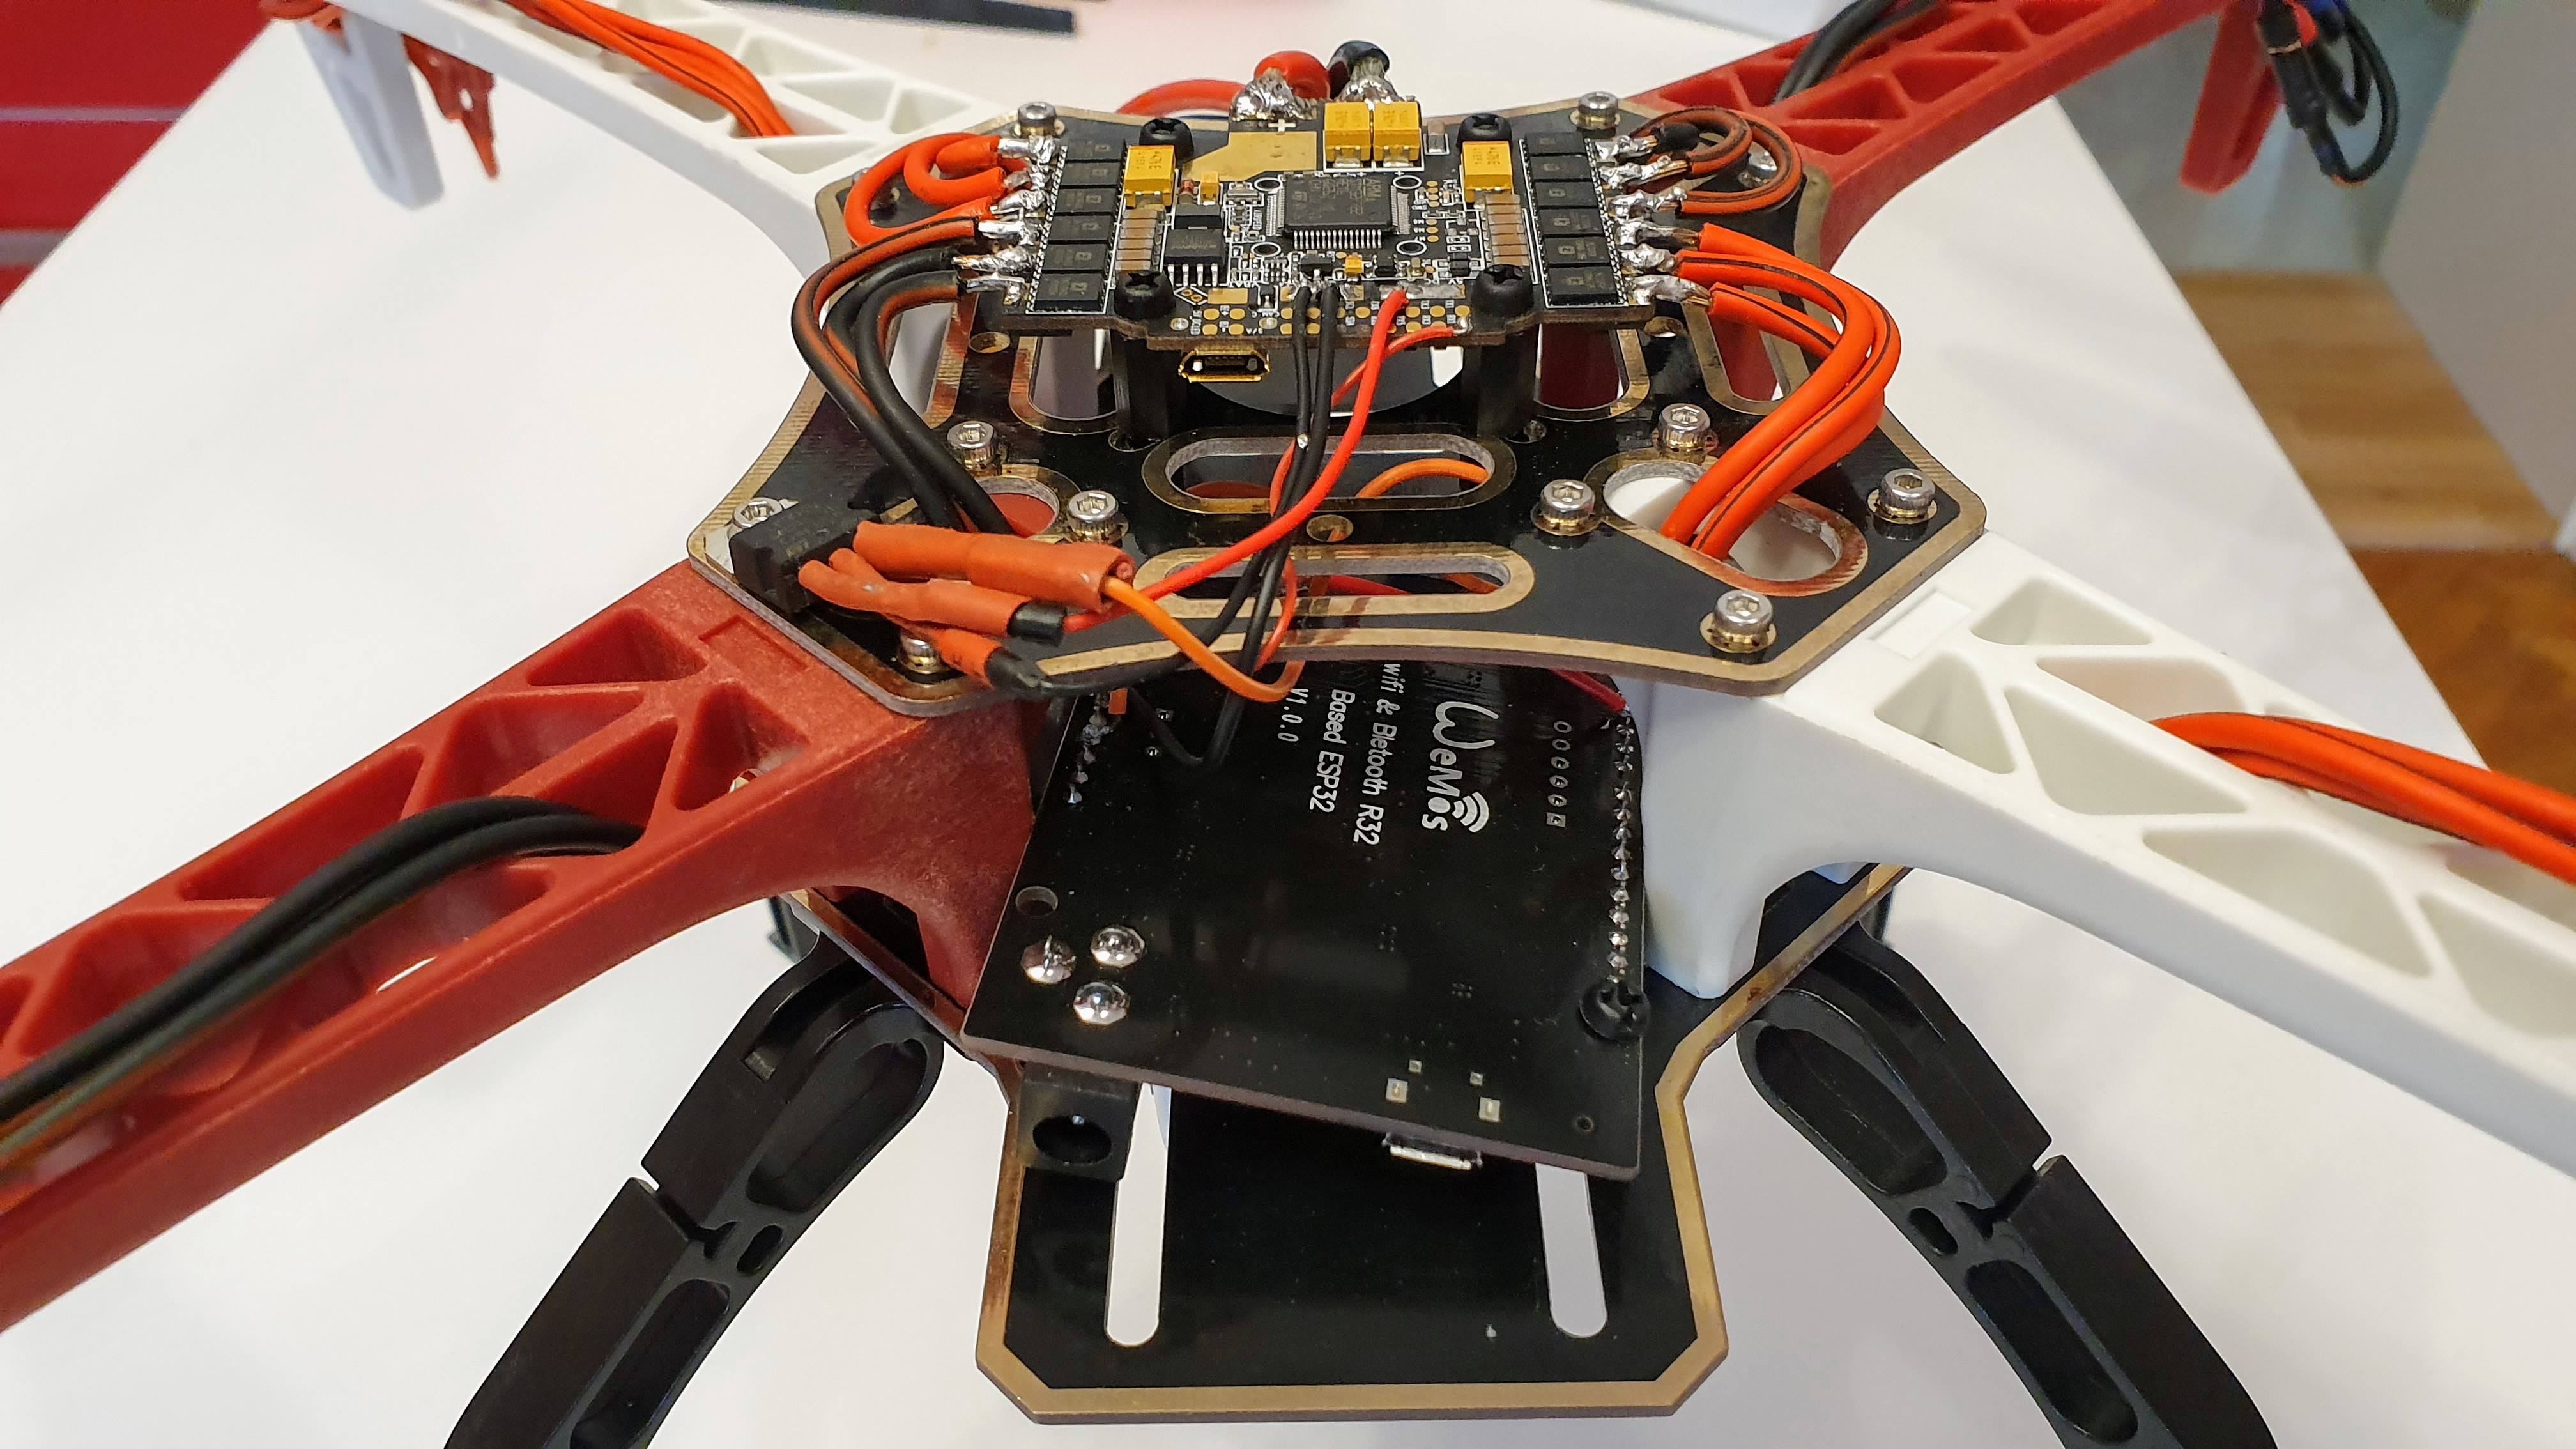
I am currently using setup below
- Frame F450
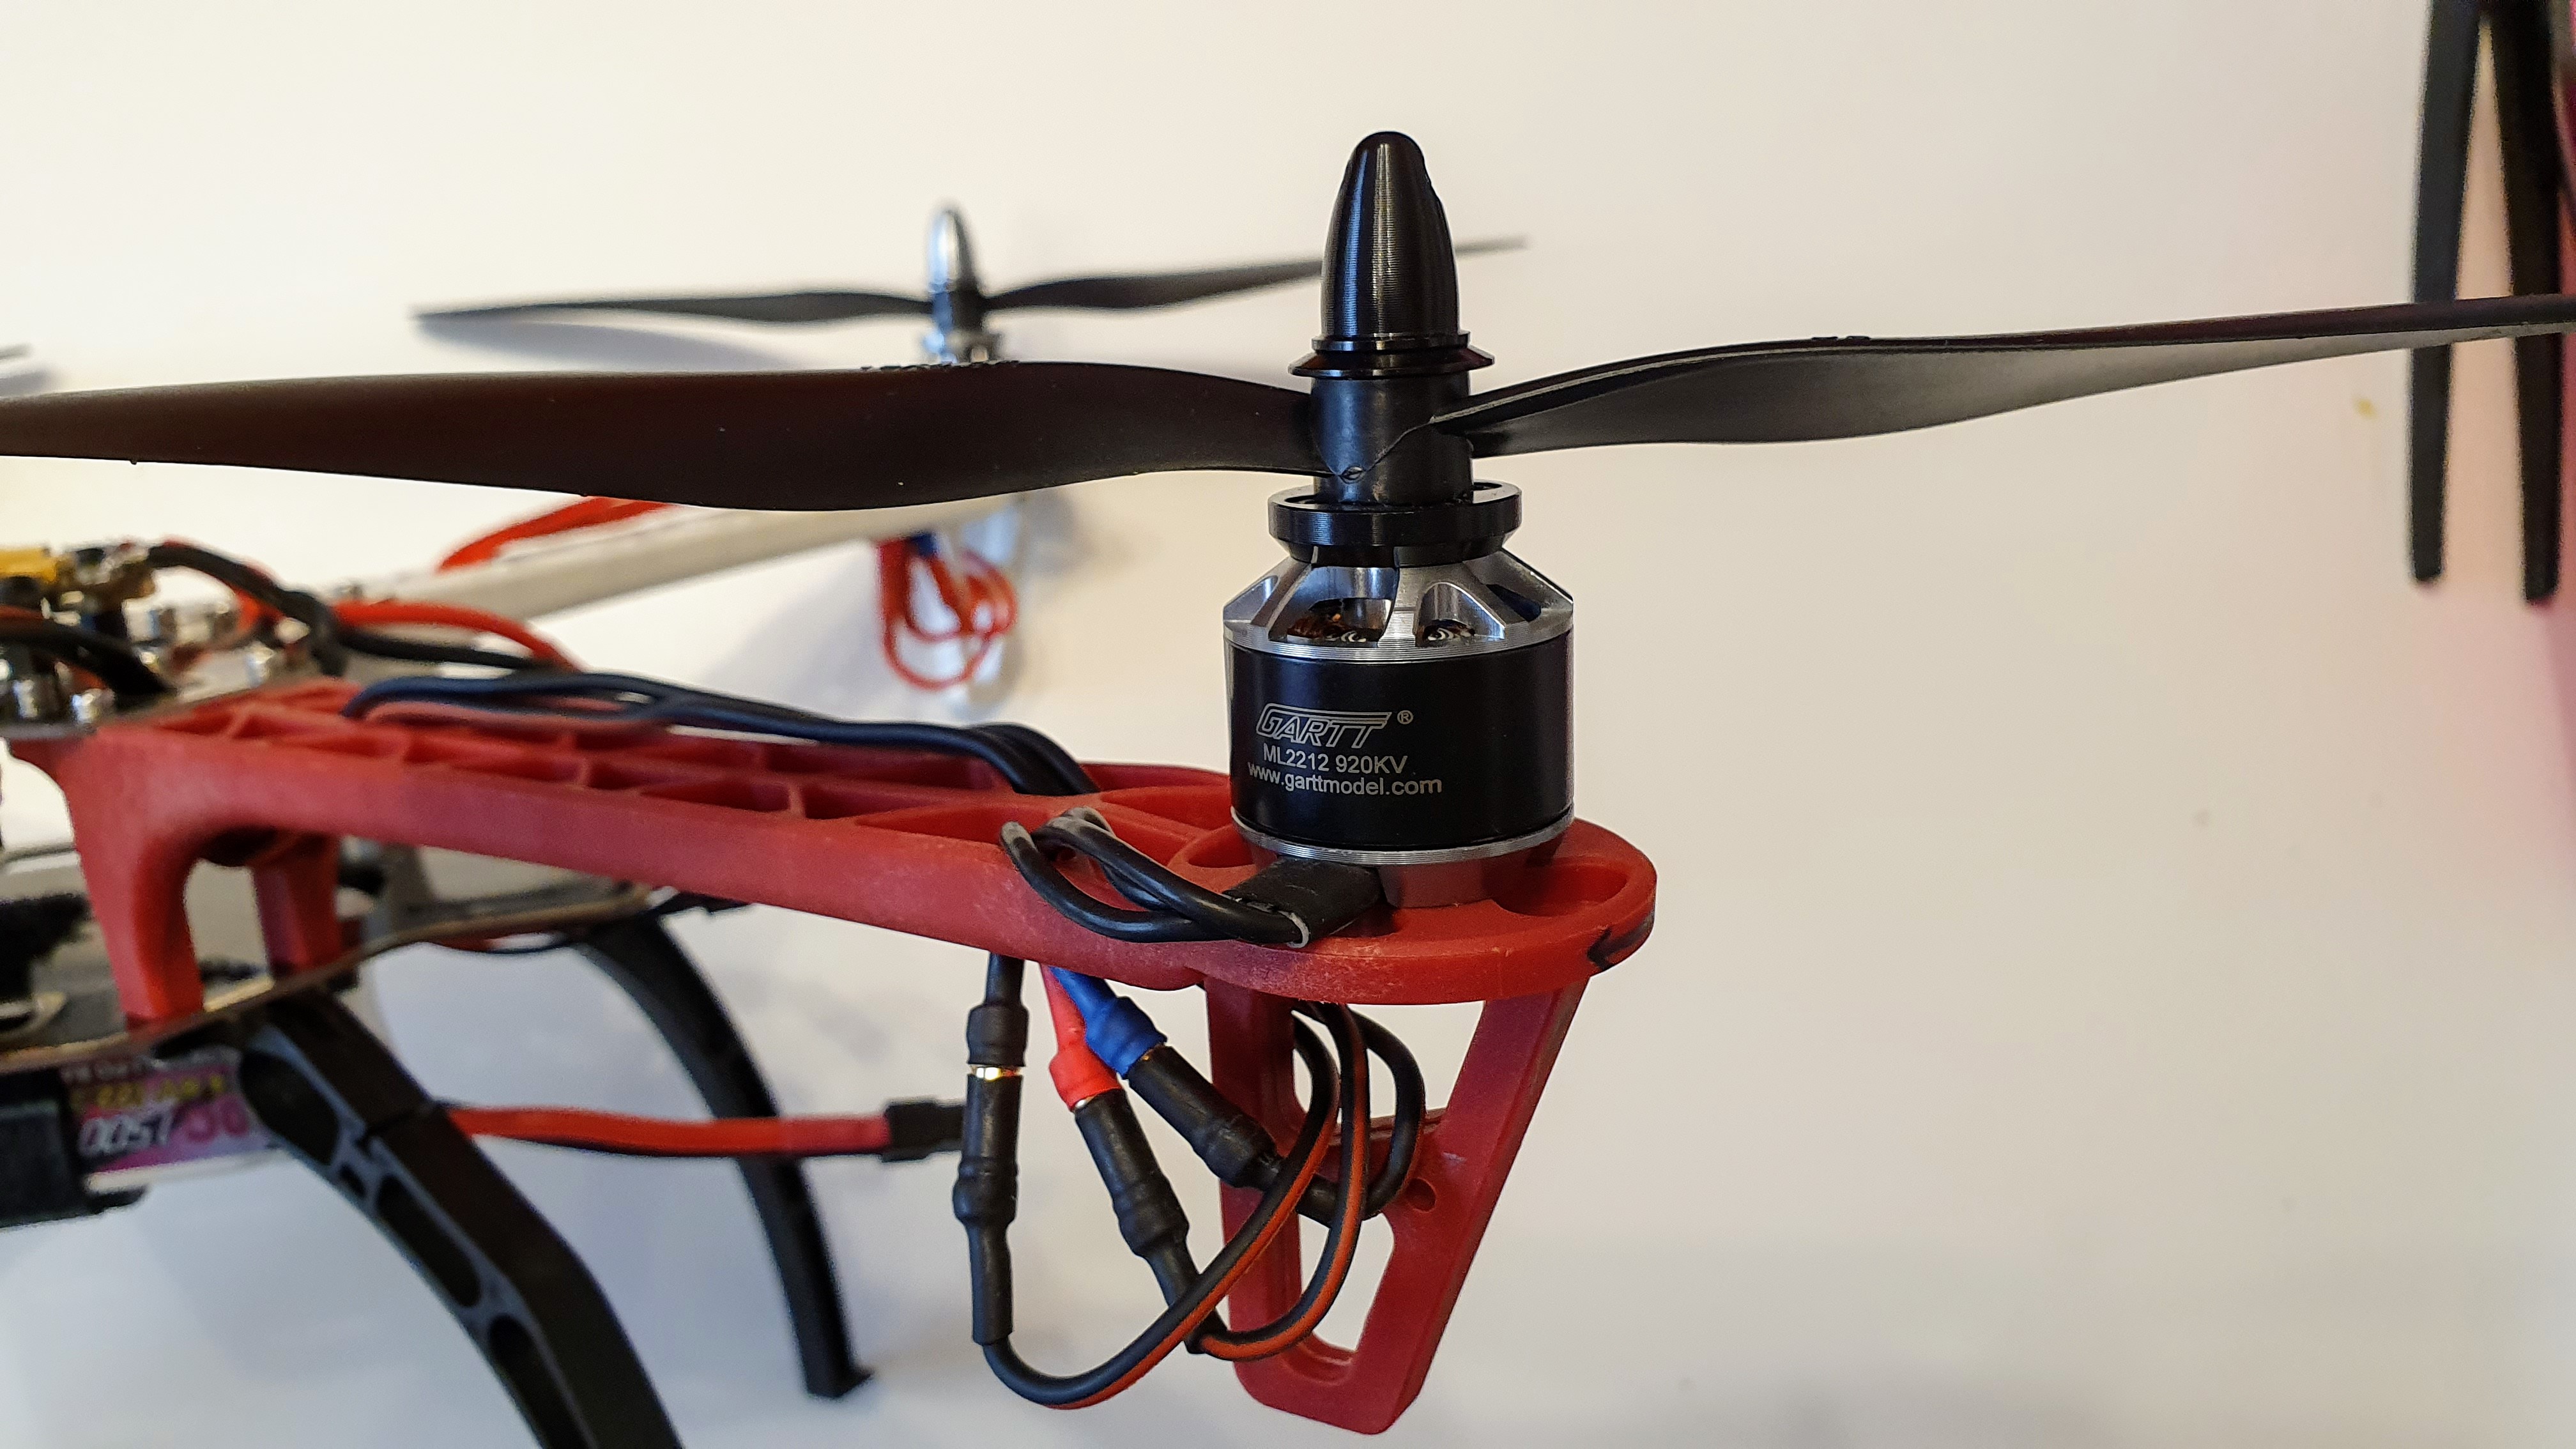
- Motors GARTT ML 2212 920KV 230W
- Propellers 10x4.5”
- FC+ESC Asgard32 F7
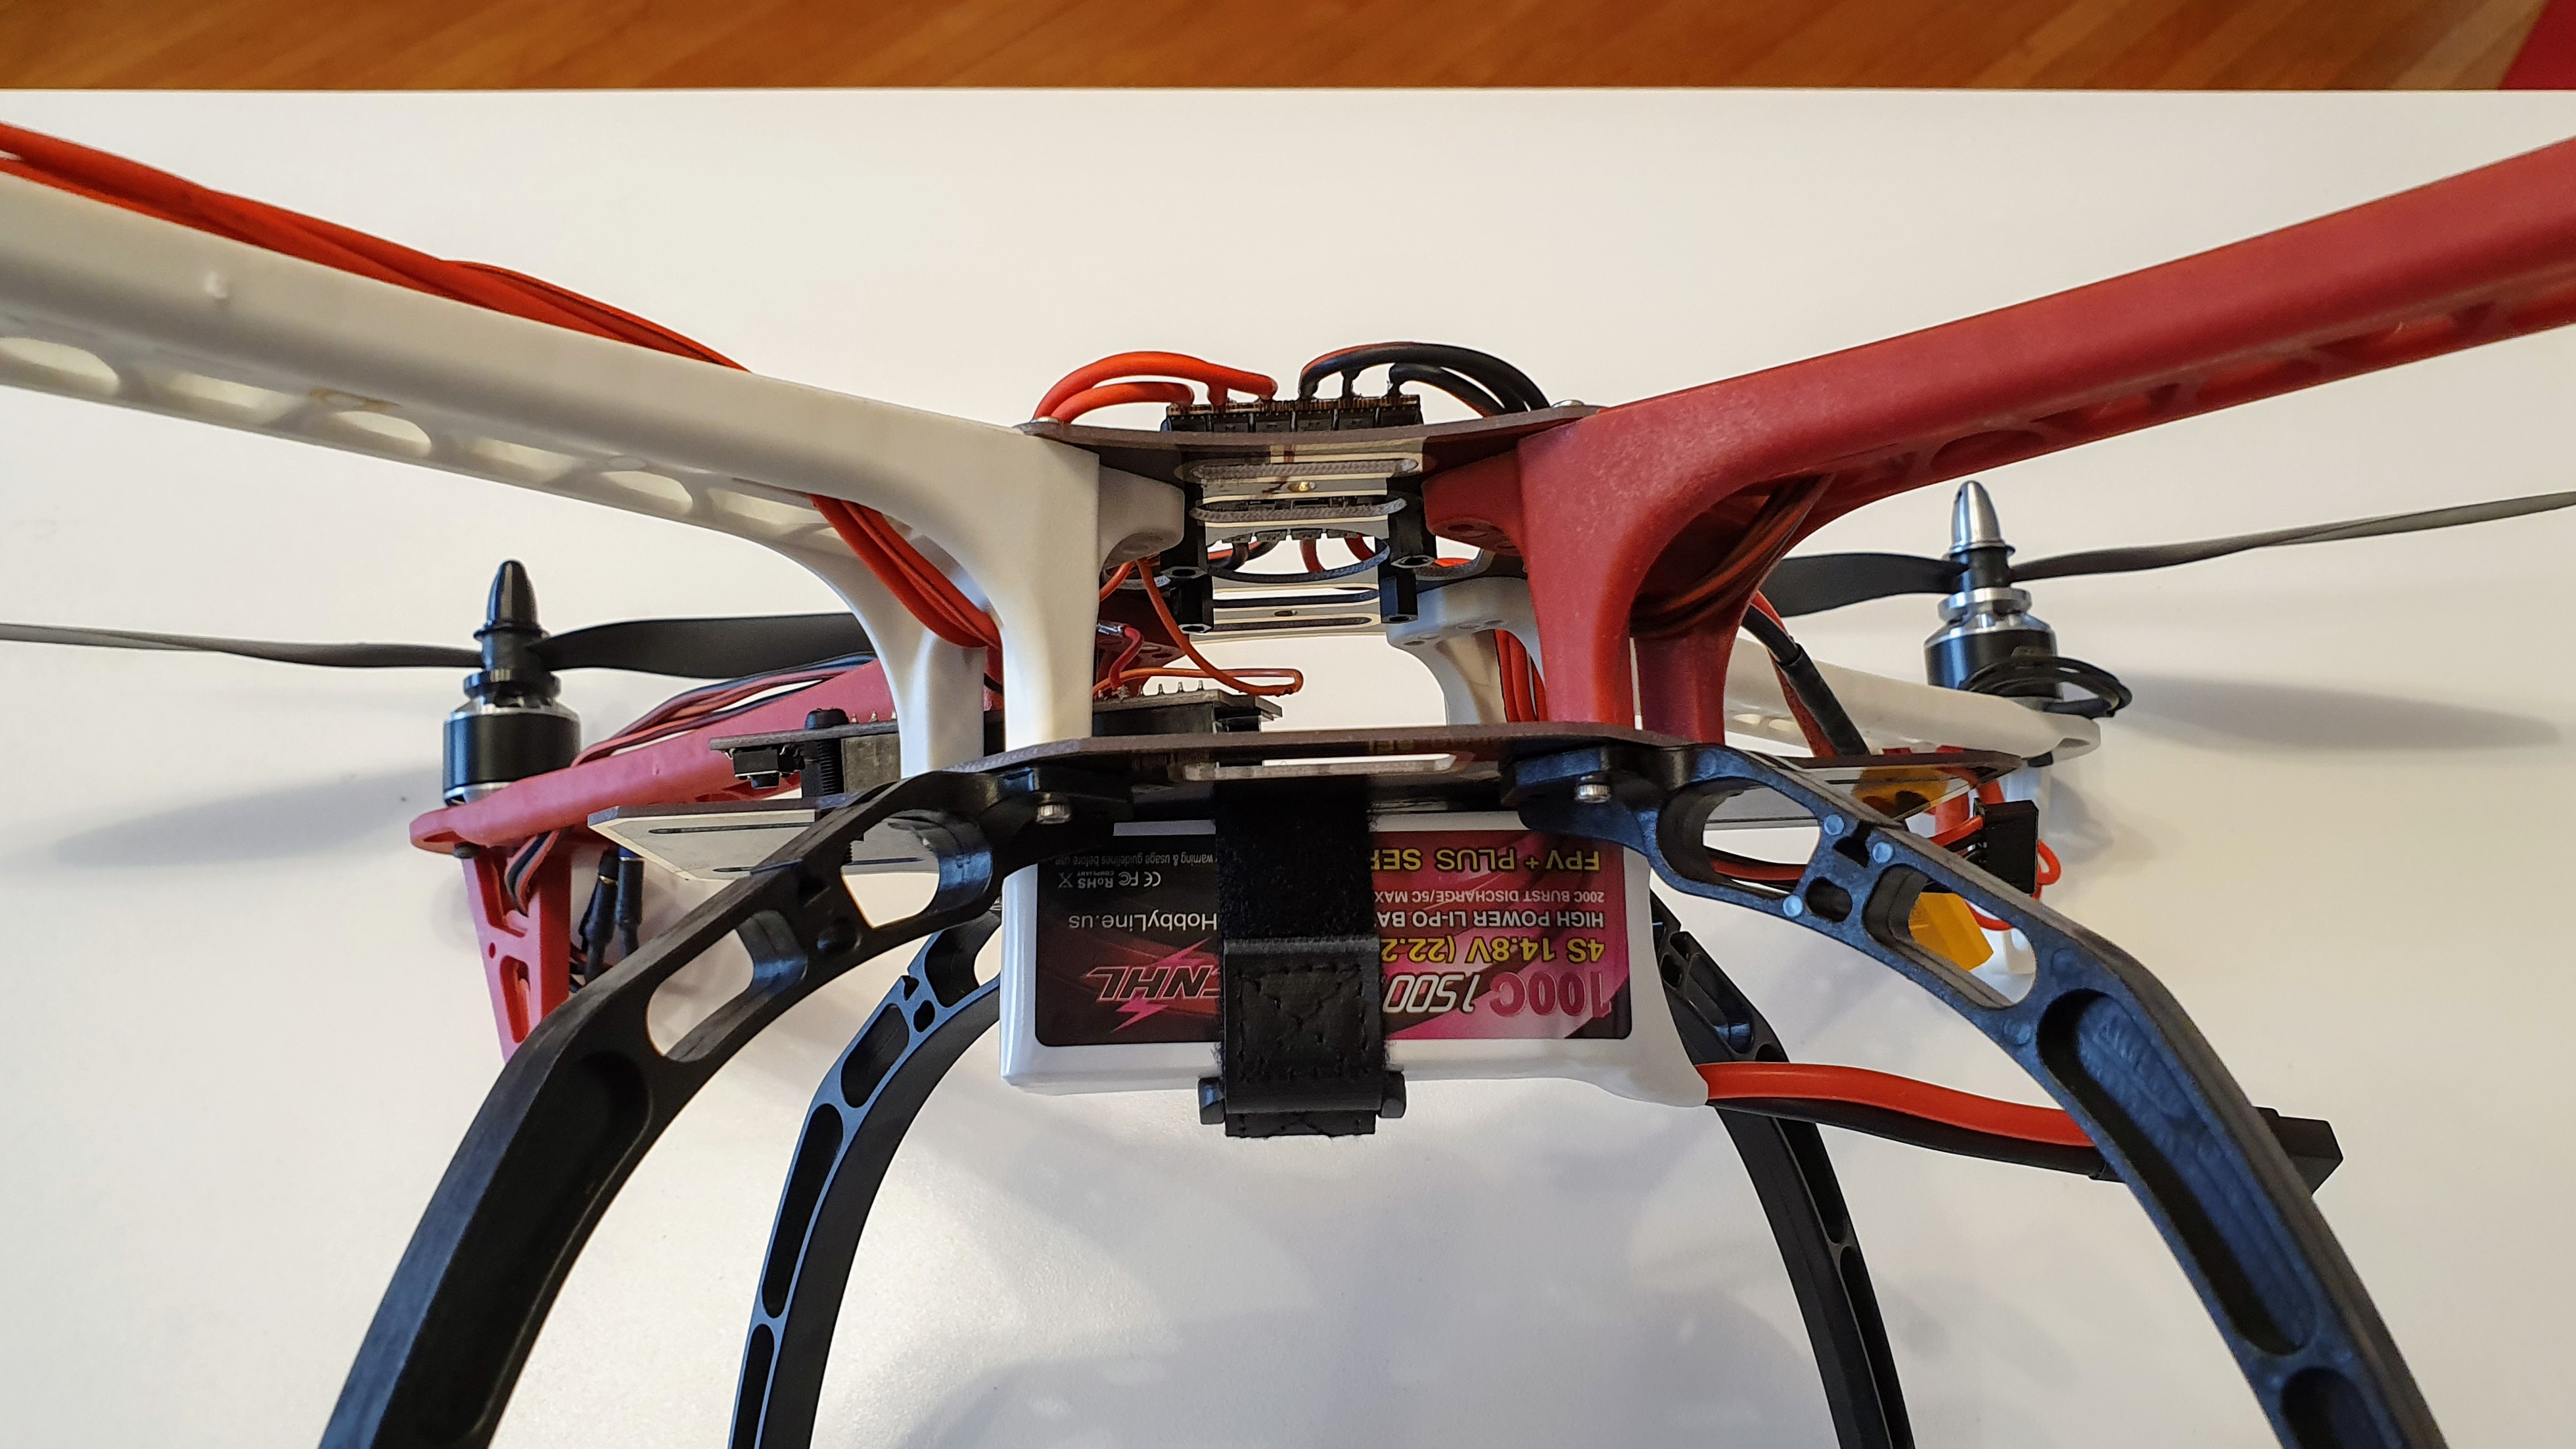
- various 3S and 4S batteries such as CNHL 4S 1500mAh
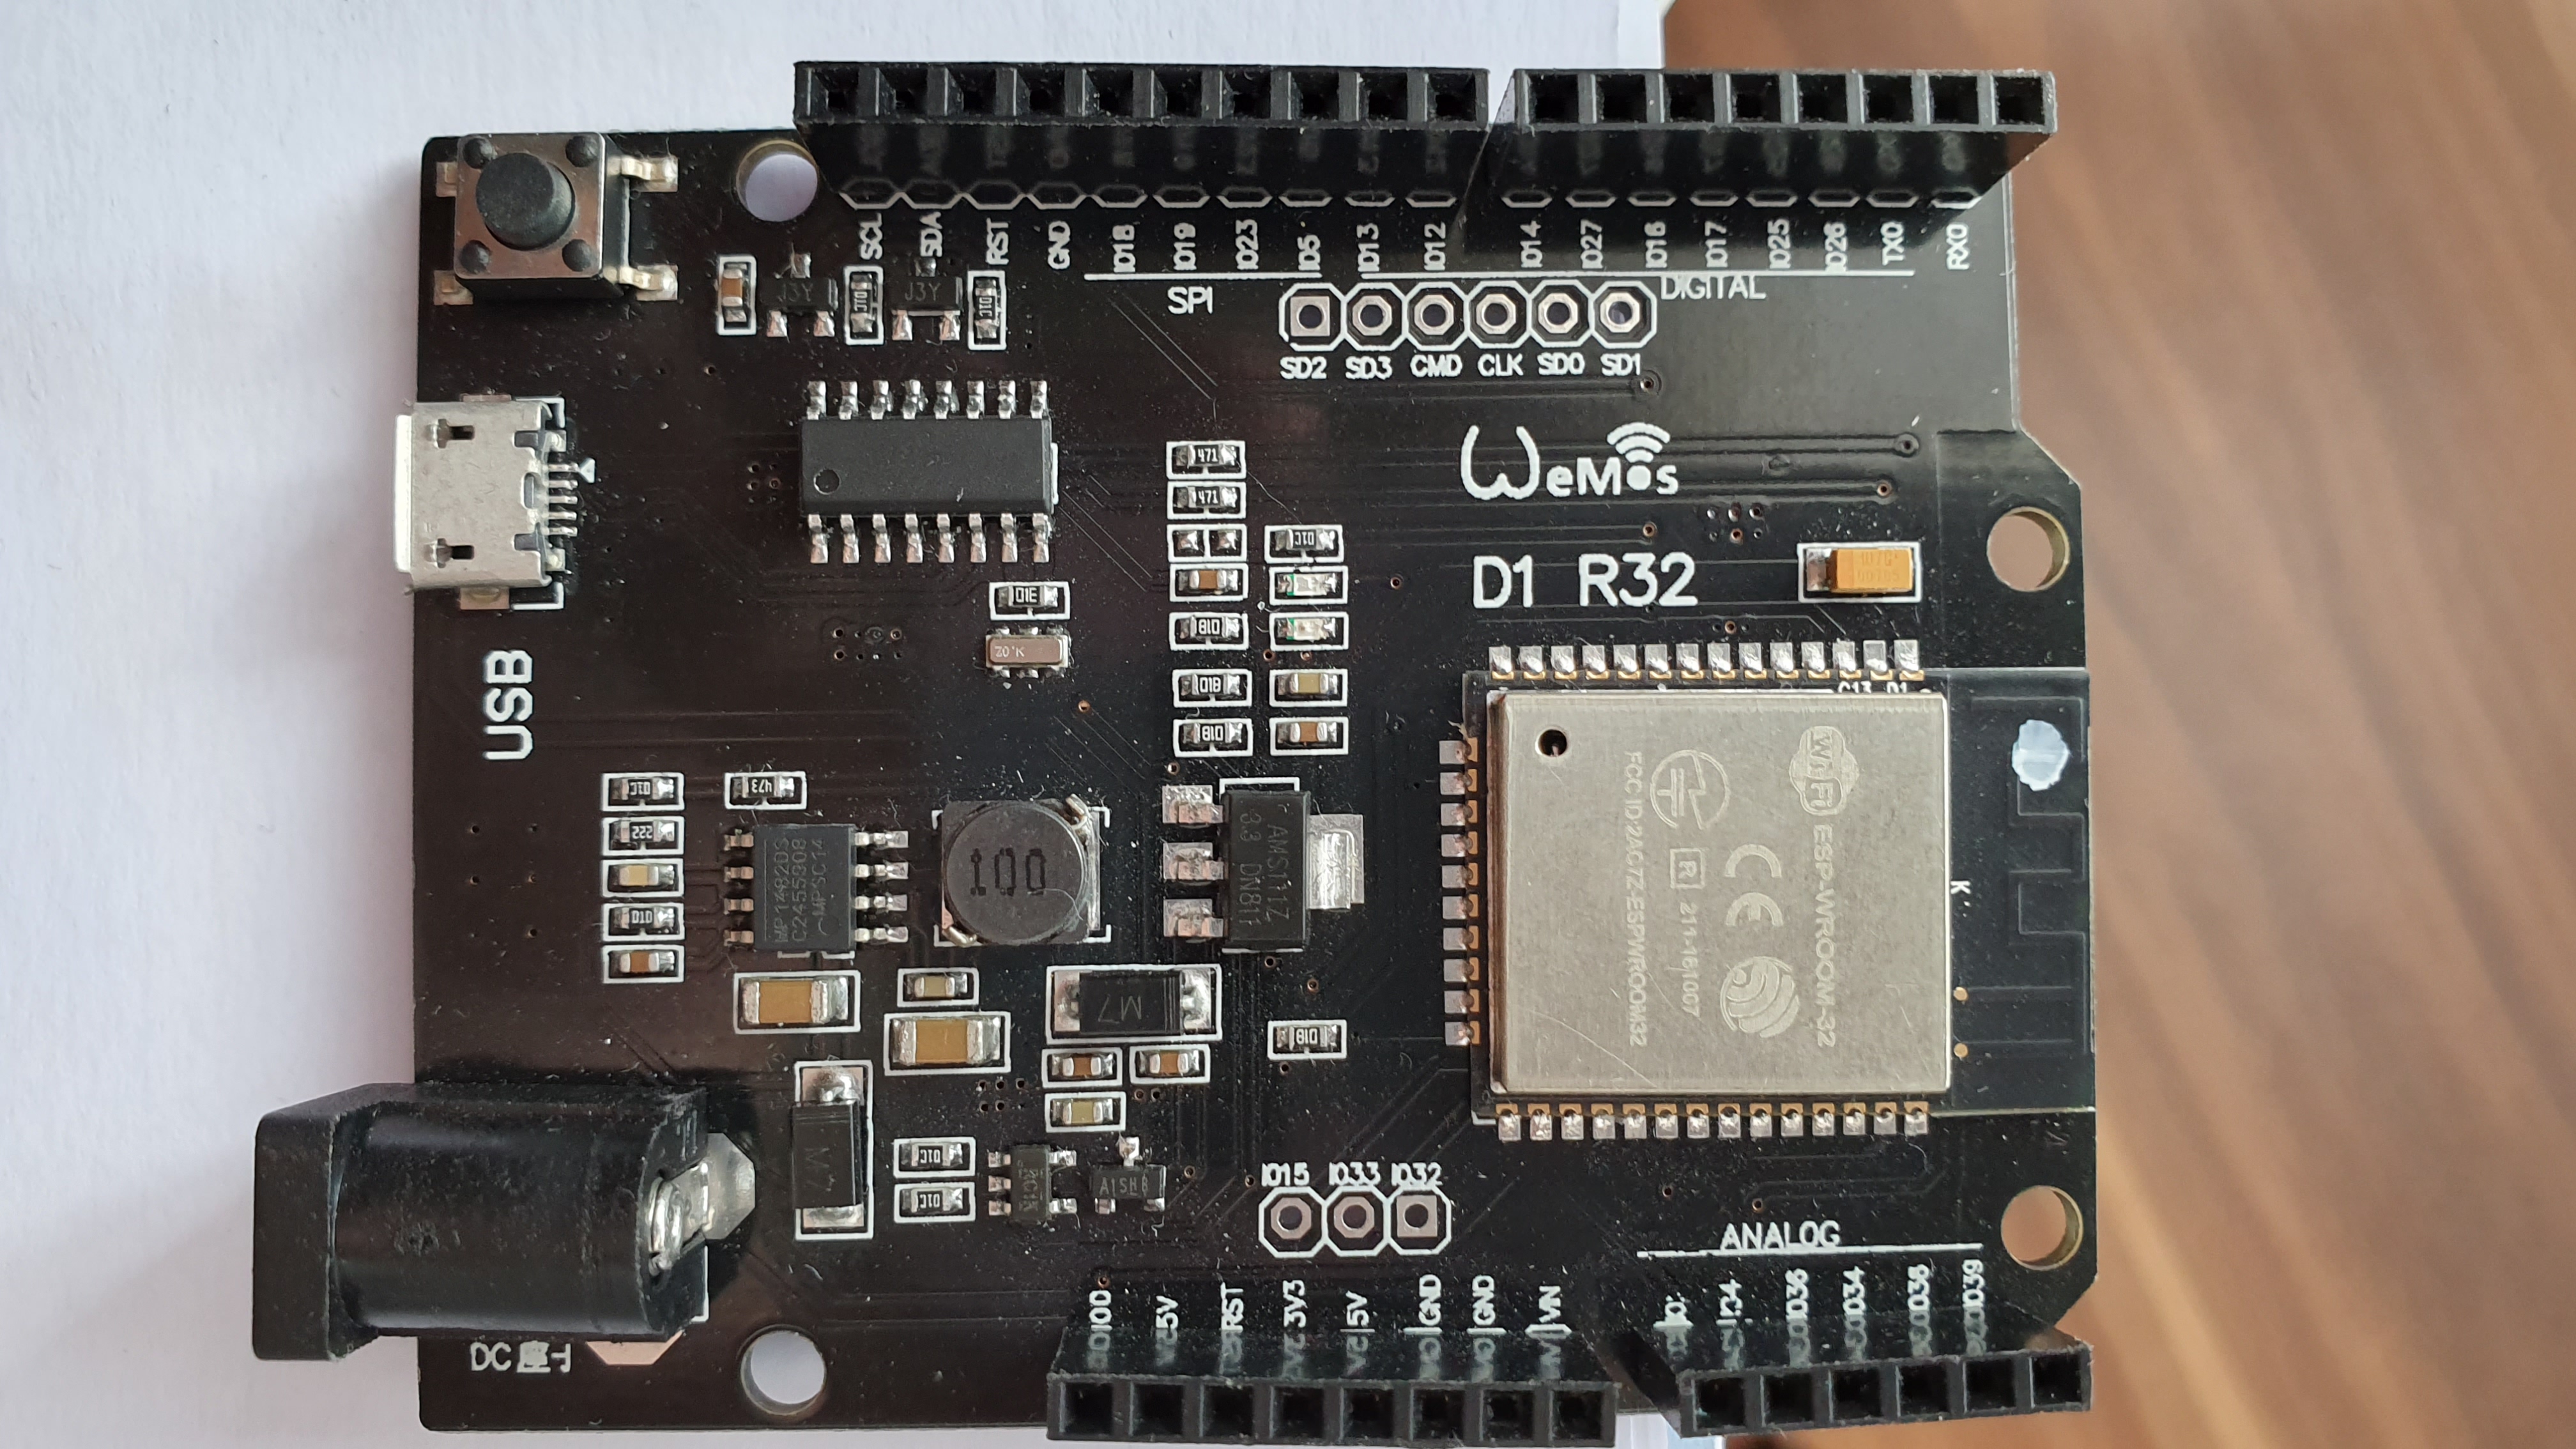
Selection and construction of a suitable ESP32 module
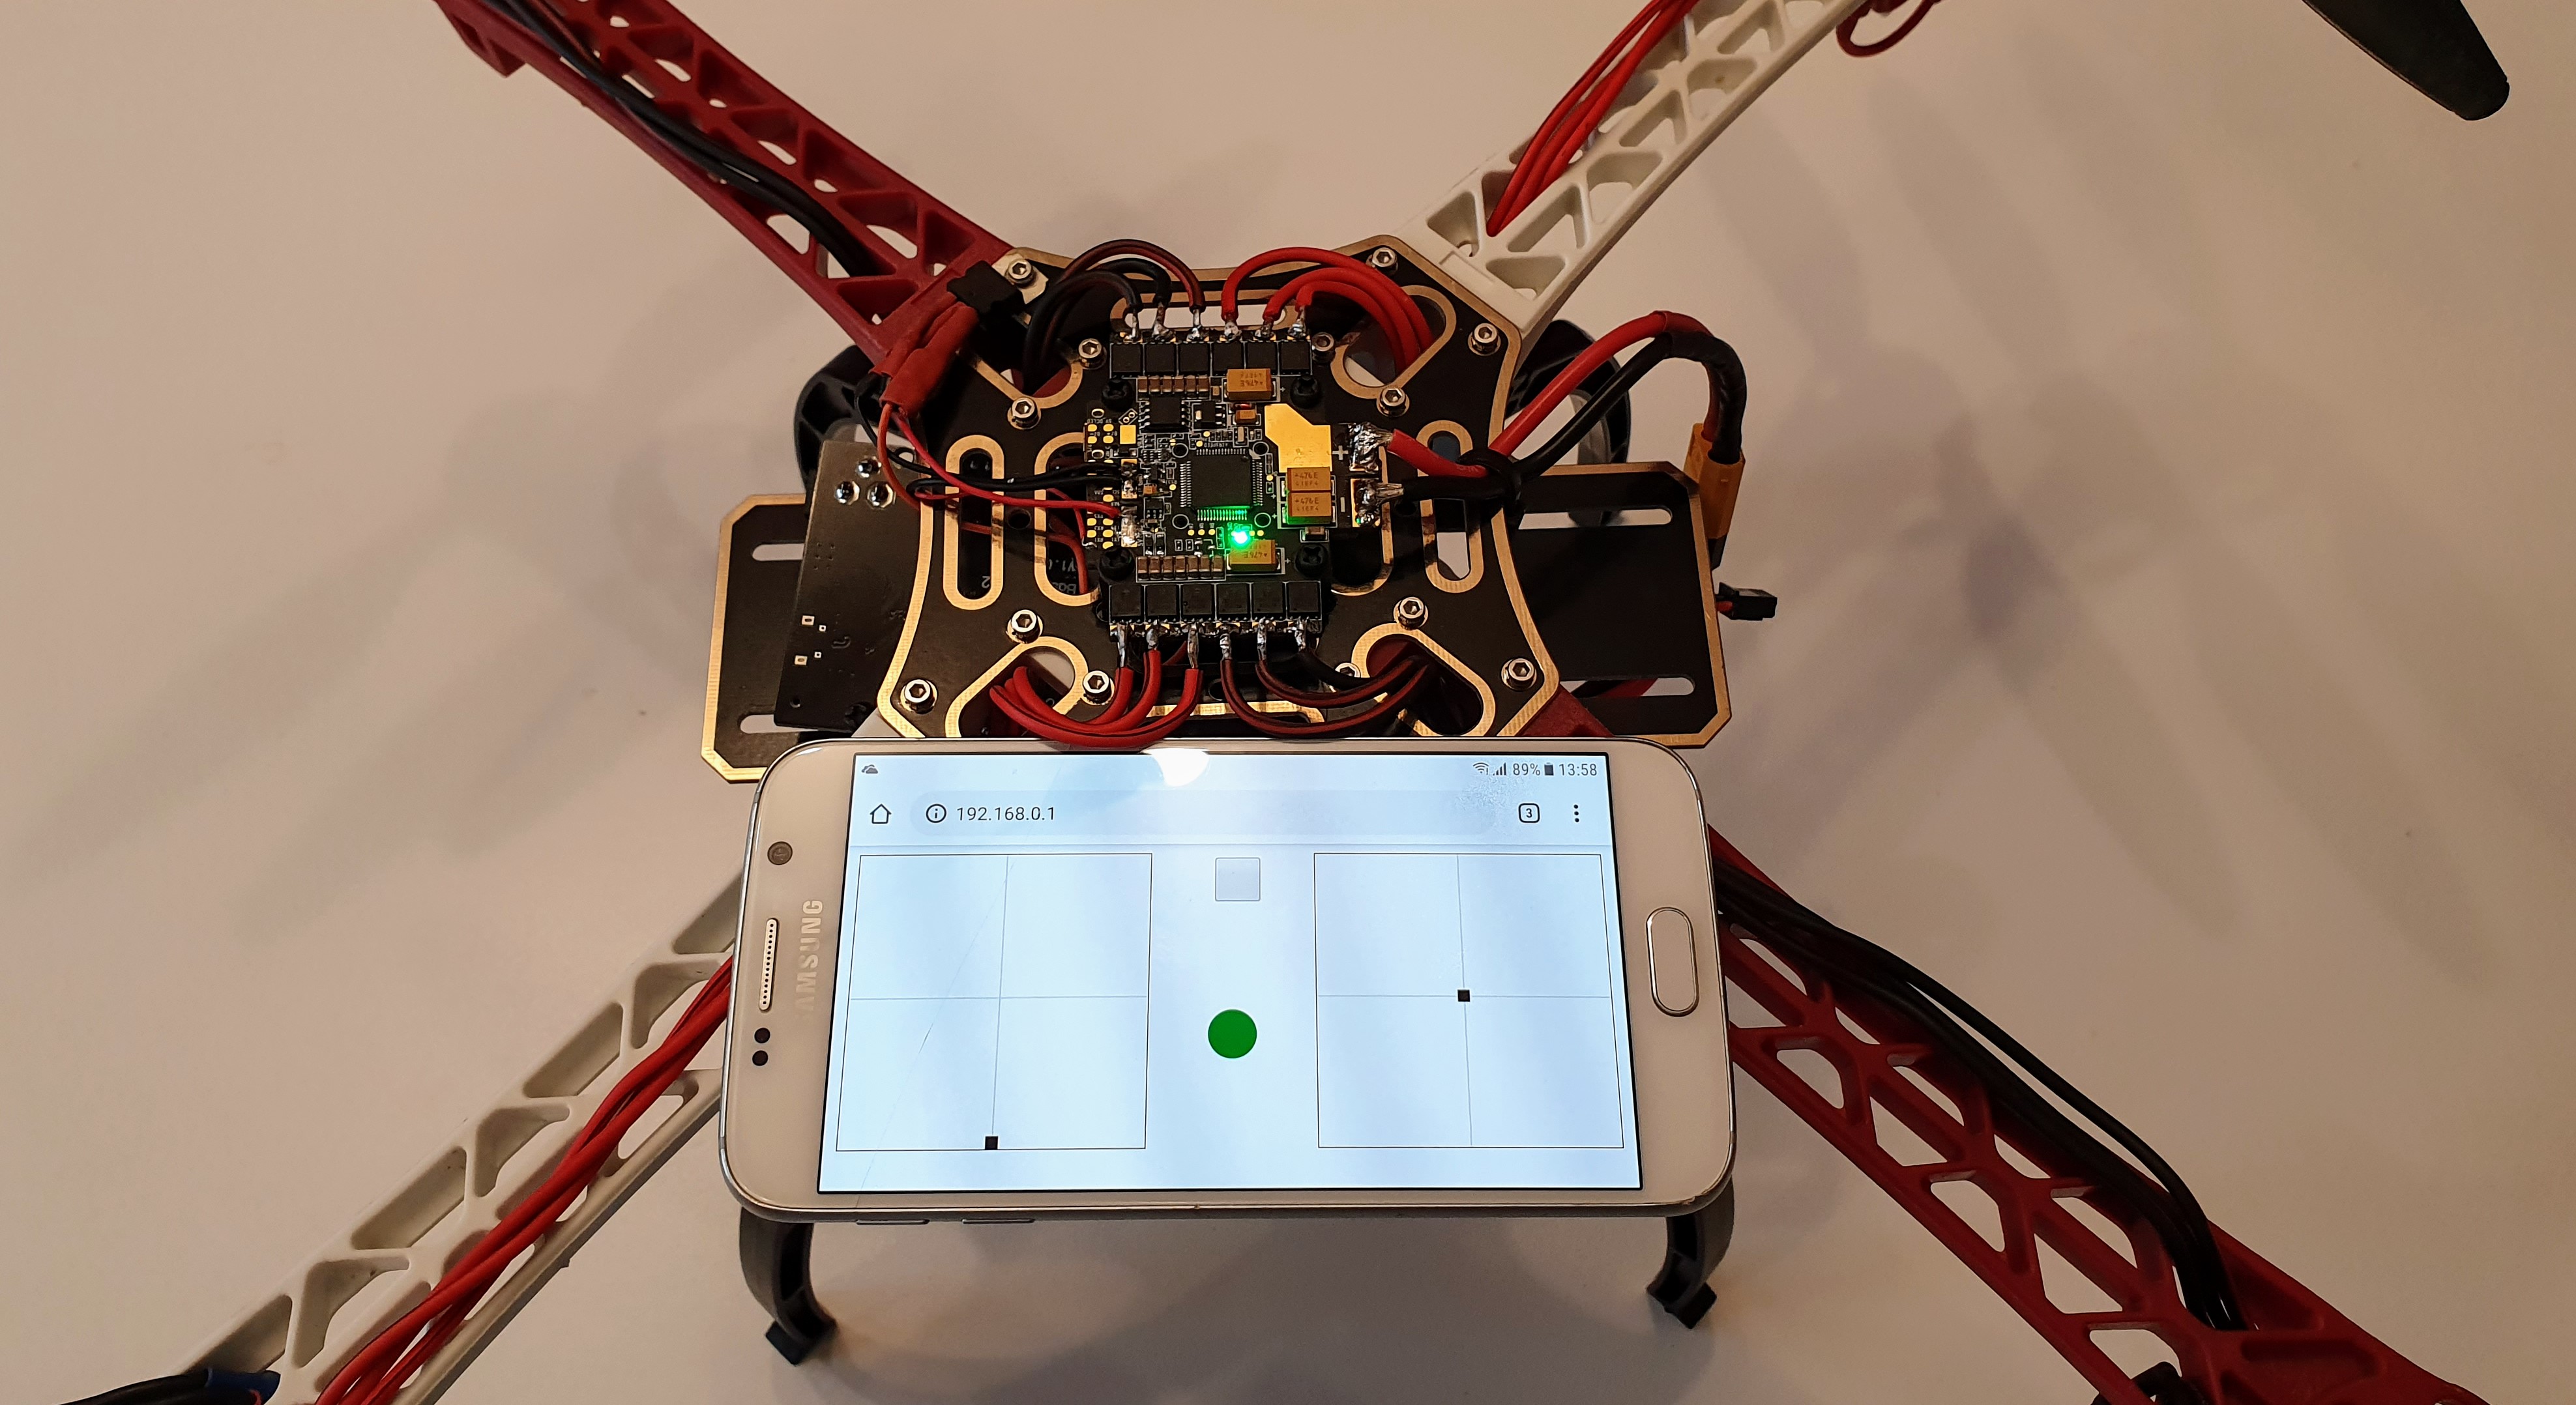
I am using Wemos D1 ESP32. It has no external antenna connector. I haven’t found any dev module with it. Maximum range is about 50 meters without external antenna in open space. It was measured with my Samsung Galaxy S6.
I am using LF33CV as a Power supply for ESP32. Wemos D1 R32 has its own power supply, but it doesn’t work with Asgard 5V (4.7V effectively). Let’s take a look at electrical schema.
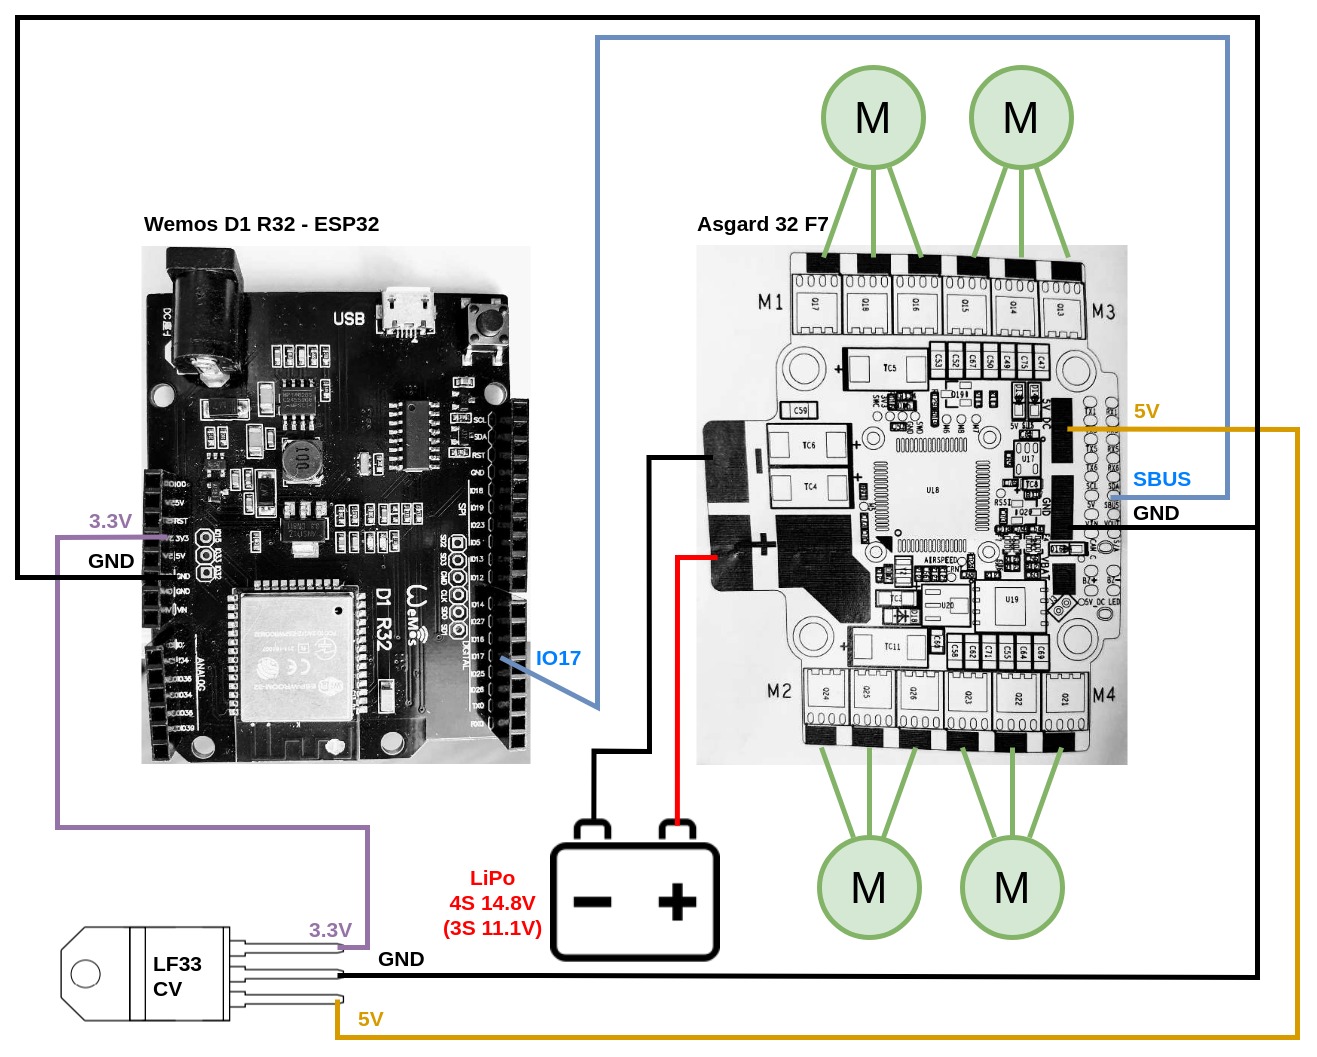
You may notice that IO17 pin is connected to pin RX1 and not to SBUS in photos. It’s because I have broken the SBUS pin. RX1 should be the same.
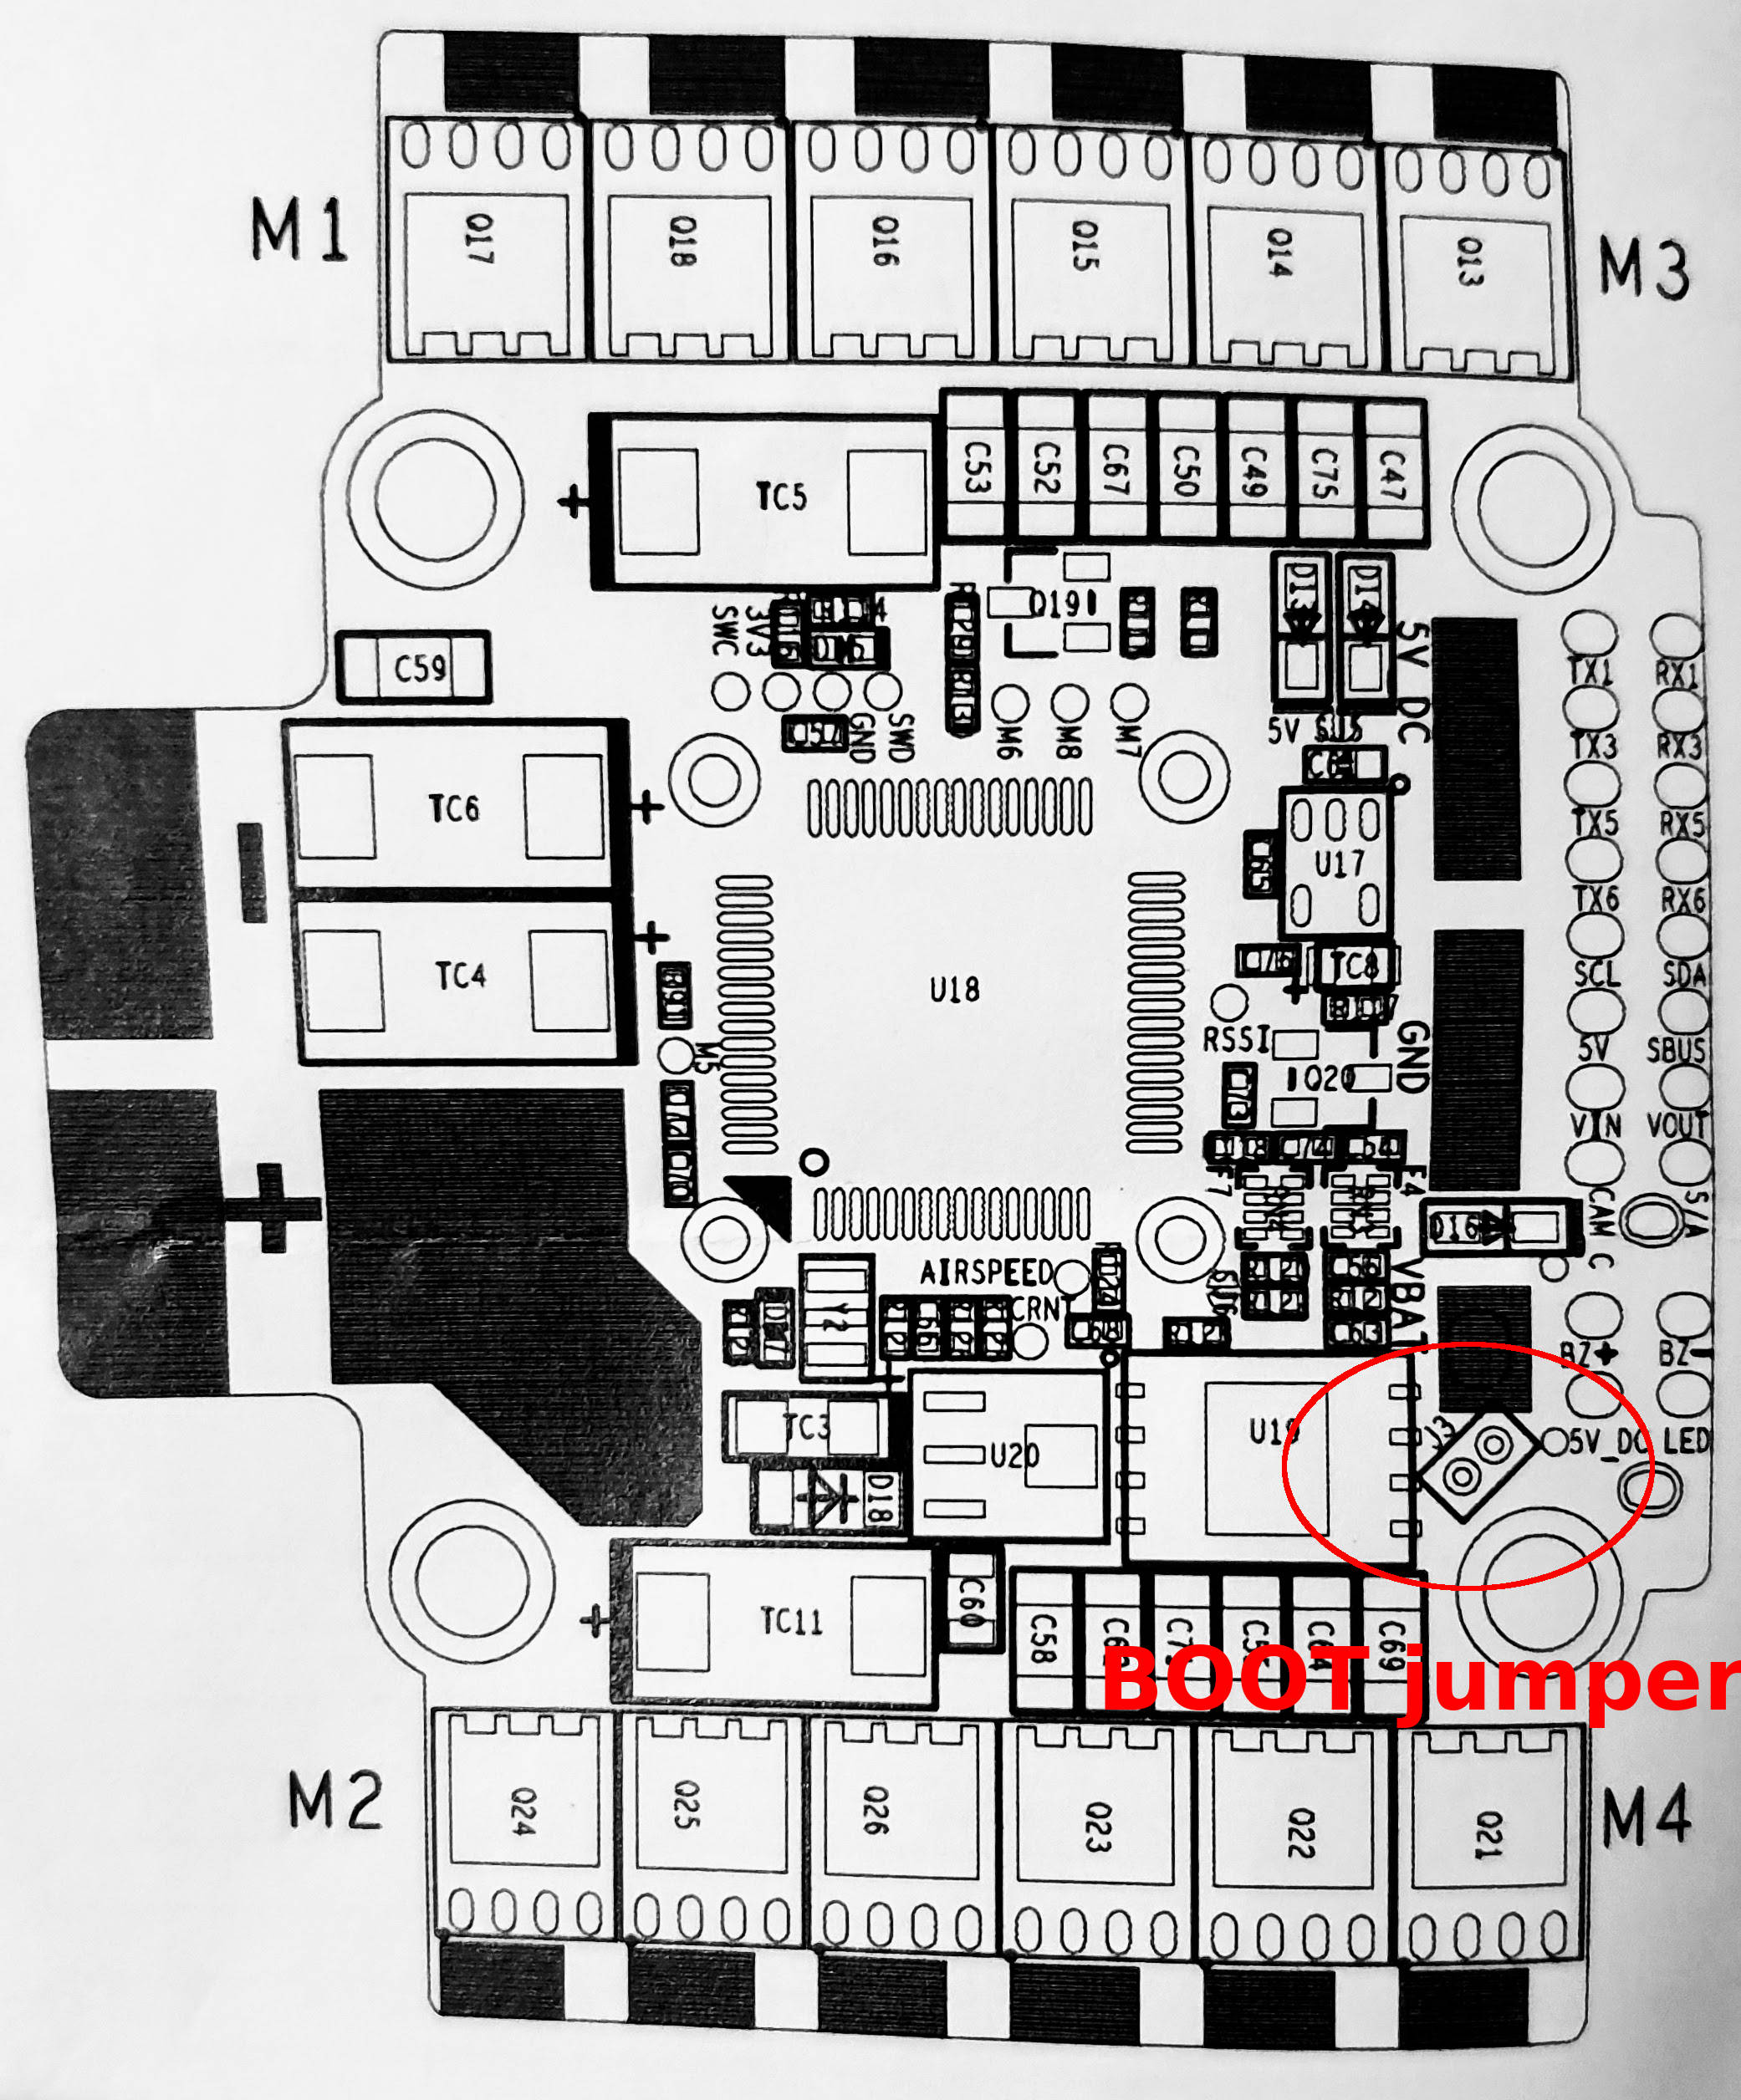
Asgard32 F7 BetaFlight setup
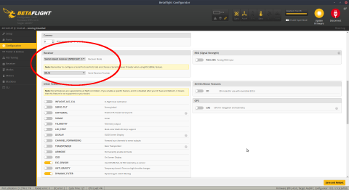
First of all, we need to update FC firmware to newest version(AG3XF7). If you are Linux user, you need to allow write access to USB. Please follow instructions in https://github.com/betaflight/betaflight/wiki/Installing-Betaflight , then connect boot jumper on FC
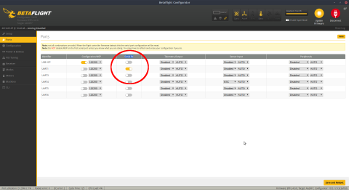
Next, we need to check some configuration options:
- Ports / UART1
- Serial Rx
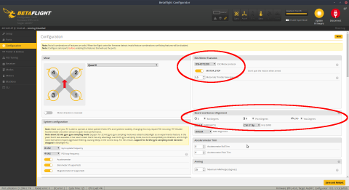
- Configuration
- ESC/Motor Features
- DSHOT1200 + MOTOR_STOP
- Board and Sensor Alignment
- check real position of FC in your drone
- Reciever
- Serial-based reciever + IBUS
- ESC/Motor Features
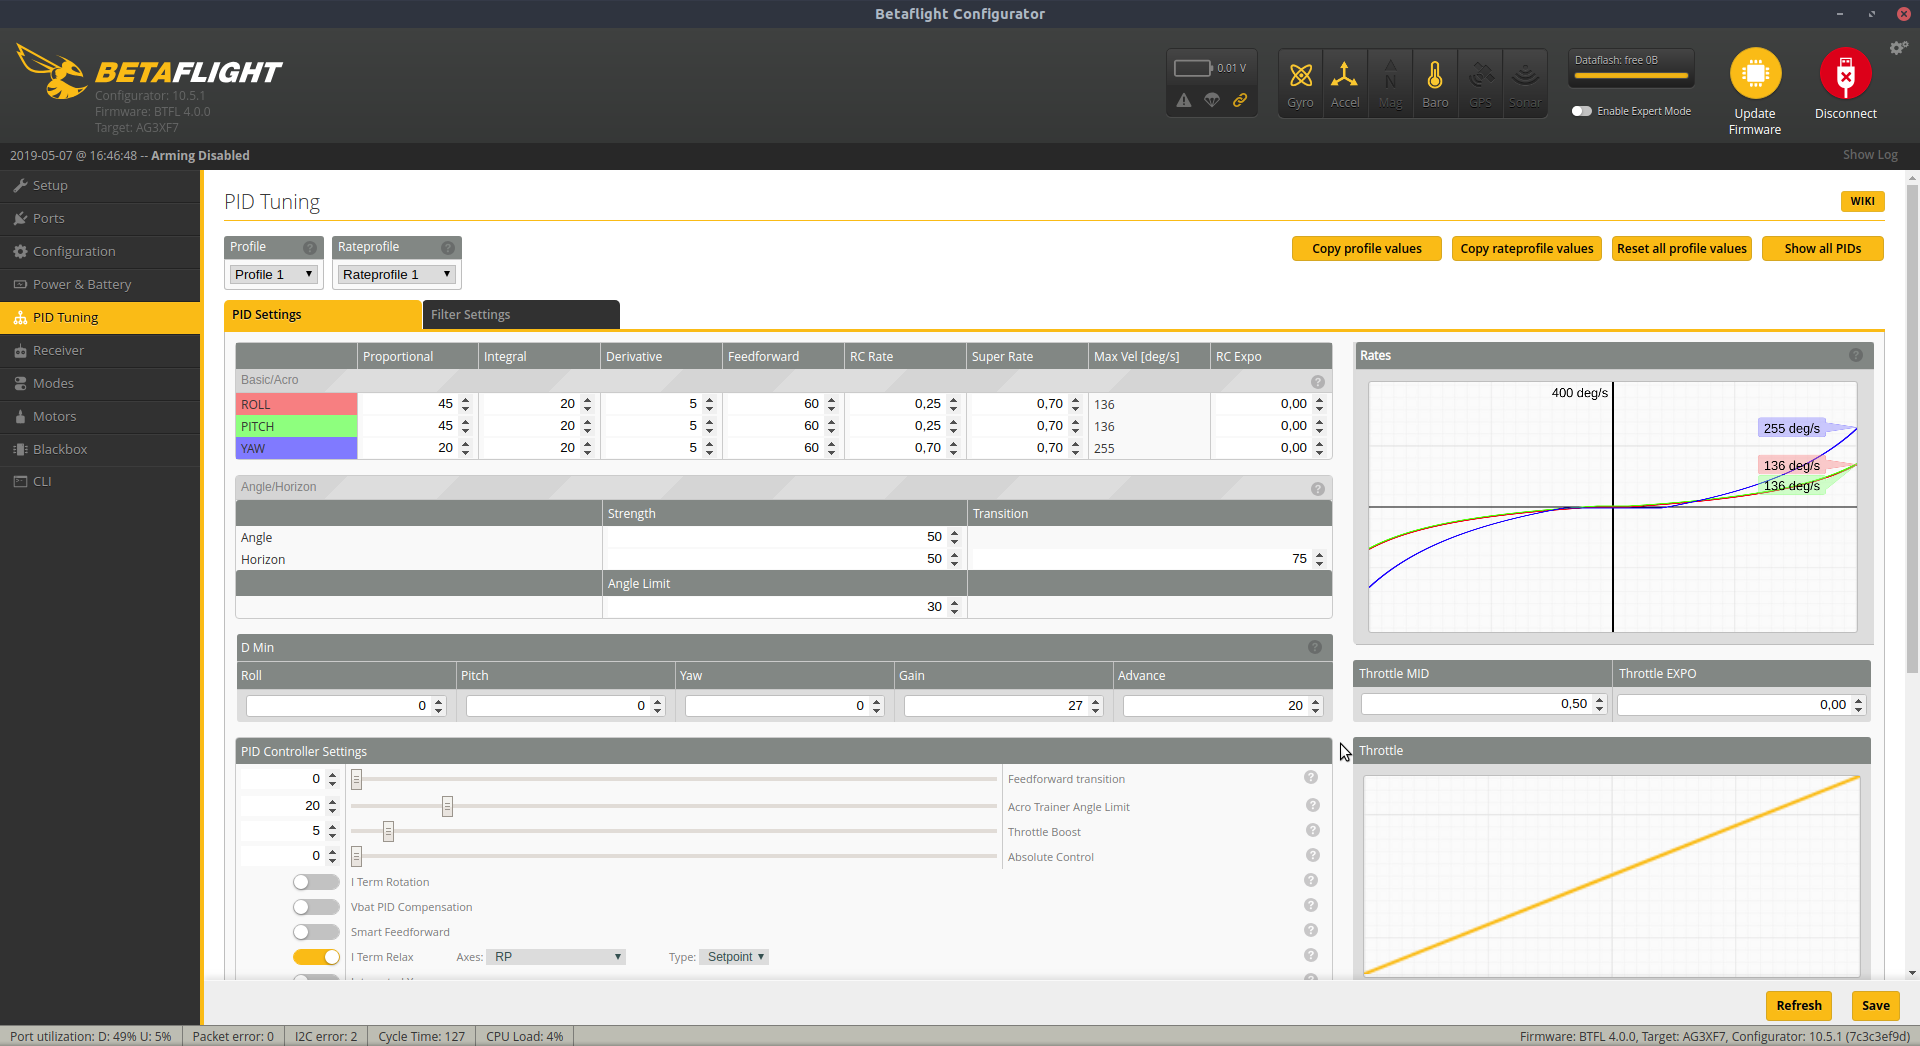
- PID Tuning
- for more informations please visit https://github.com/betaflight/betaflight/wiki/PID-Tuning-Guide
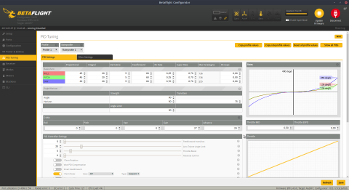
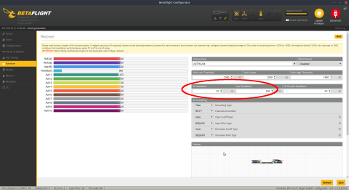
- Reciever
- check my Deadband configuration for beginners. Display is not as accurate as controller sticks
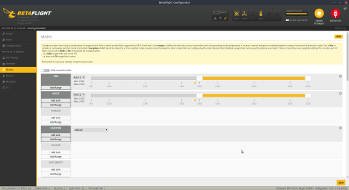
- Modes
- there is only one AUX switch in controller v1.0.0, so it enable all modes


Upload ESP32 software
Download https://github.com/MichalSchwarz/wifi-drone-esp32 in to your preferred directory:
git clone --branch v1.0.0 git@github.com:MichalSchwarz/wifi-drone-esp32.git
Then download JS controller https://github.com/MichalSchwarz/rc-controller in to your preferred directory:
git clone --branch v1.0.0 git@github.com:MichalSchwarz/rc-controller.git
Two more files are needed to compile esp32 project. The first one is secret.h, there you can specify drone wifi SSID and password. Default SSID is quadcopter and password is also quadcopter.
cd wifi-drone-esp32/src
wget https://michalschwarz.github.io/rc-controller/assets/secret.h
The second one is JS controller itself. We can copy it from rc-controller project or simply make a symbolic link:
ln -s ../../rc-controller/dist/index_html.h
I am using VS Code with Arduino plugin for compile and upload code to ESP32. Standard esp32 library is needed for compilation, for more informations please visit https://github.com/espressif/arduino-esp32.